Thursday, January 19, 2012

Love Story

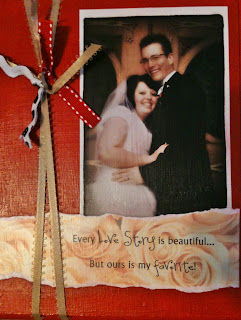
I came across this quote and instantly fell in love with it:

"Every Love Story is beautiful... but ours is my Favorite!"

Isn't it just too cute?!
Well, I'm lacking in the Valentine's decor and wanted to somehow incorporate it into our home. So I made a little wooden plaque  - stick in on an easle and easy, peasy cute!

(supplies needed: piece of wood, red acrylic paint, modge podge, ribbon, scrapbook paper, computer/printer, picture of you and your sweetheart)

Tuesday, January 17, 2012

Love Notes

 We've had a "mailbox" before for Valentine's day - where Cupid would leave notes of praise and/or rebuke, treats and prizes for The Child for a few weeks before Valentine's Day{that actually worked really well in the discipline area, just fyi}. But after seeing how much she LOVED our Christmas Advent Calendar, that was filled with notes to each other and candy,  I really wanted to make something that we could again leave little notes for one another.

I found this cute little mailbox at Target for $1 {can't beat that right?!} and with the help of a little paper, rub on letters and ribbon we ended up with a cute little mailbox to leave "LOVE NOTES" for each other. I also have a gazillion tiny envelopes that I scored at NPS one day - and The Child loves putting things in envelopes, so of course she loved the whole concept of this.

It's so fun to get "mail"... at any age... and definitely fun when the mail you get is a Love Note.


Saturday, December 24, 2011

Retro - Remake

My parents have this sa-weet high chair from when we were kids...metal frame, padded seat, metal tray... classic! Well it was yellow and old and dirty and didn't really go with their current kitchen decor.
I needed a Christmas present for my Mom that wouldn't break the bank since I'm trying to watch the budget these days {and heck, truth be told - it'll benefit me too, since I won't have to haul a highchair for my little guy to their house when we go for family dinners! two birds. one stone. oh yeah, baby} ... anyways, I asked my Dad if he'd dig it out for me and if I could remake it.

Here's what we started with... it's not bad, but gonna get better....the foam inside the seat was in really good condition so I didn't replace it... and the cute black fake leather I got from NPS for a steal of a deal ($3.99 a yard and 50%off that. I totally felt like a criminal)
 Oh and check out the sweet print I found under the yellow layer (that my parents had recovered it with once before)... awesome huh?
 See, told ya! I LOVE how it turned out! To be honest, I wish it was going to live at my house.... but it'll look great at Grandmas! {especially with my little guy in it!}

Oh and another perk of this project... I totally learned how to use a staple gun. I know, a bit pathetic that I'm just now being introduced to MY NEW BEST FRIEND! As soon as my hand recovers from using the staple gun, I'm gonna staple me up something else!

(supplies needed: a highchair, fake leather, staple gun)
Tuesday, November 15, 2011

Turkey Turkey

I really love Wood Crafts... It's a darn good thing I don't live really close to The Wood Connection because all my money would be spent there. Since I'm trying to be budget-minded these days, my favorite place to find/buy wooden crafts is at my local DI or Savers. I always find treasures there, I tell ya what.
I found this cute little turkey at Savers for $3.99. Wanted to give him a fresh coat of paint and put some of my own personality into him... I just love him!
BEFORE:
 AFTER:

(I've decided I really need to put a book together to document what decorations I really have and what I'm "in need" of... because when I saw him I said to myself... oh i have to get him, because I don't have ANY turkeys. Yeah, well after sprusing him up and getting out the other Thanksgiving decorations - yeah, I have more than a couple turkeys. Oh well, at least he has lots of friends now at my house, ha ha)

Friday, October 7, 2011

New Bathroom Decor

When I decorated my bathroom I was never totally in love with one wall... and the problem was that was the wall that was the biggest/emptiest wall (only the towel rod was on that wall) and it was directly across from the toilet... so lets face it, that's the wall people spend the most time looking at. I originally had 3 small, brown, square frames and pictures of our family and of course the towels were arranged cute on the rod below. It looked fine. But there was still alot of white wall showing and it bothered me.
One day I was perusing my local DI and I came across these 3 rectangular frames. I knew I could come up with something for my bathroom. A little green spray paint, some cute scrapbook paper, modge podge and clear spray paint to seal it did the trick. Add a little ribbon and they were up and I was much happier with the bathroom.
Another bonus - it was a little chilly outside when I spraid the clear spray paint to seal the project... and it made the green paint "crackle" ... I totally LOVE how it turned out! I think the crackle mistake makes the project that much cuter!!


when i get my bathroom all clean and tidy I'll have to give y'all a tour of the rest of it... I love the Brown, Turquoise and Green all together. Quite the color combo, I know... but I think it's adorable!

Saturday, August 13, 2011

Jewlery Holder

 Got this at D.I. the other day... It a shutter painted red white and blue and decorated Americana-ish... I had other ideas for it for my cute little sister's bday present (she's kinda got ALOT of jewlery... so a cute way to store and display it was what I was hoping for).
 The pictures aren't great, but you'll get the idea.
I cut out 5 of the "panels" from the middle of the shutter. Painted everything black. Modge-podged scrapbook paper to the top and bottom pieces. Roughed up all the edges with a nail file. Hot glued a piece of plastic canvas stuff  to the empty space in the middle (where the slats were before I cut them out). Framed the canvas with some dowels, which were cut, glued, painted and roughed up). Added screw-in hooks to the bottom slats. And covered the whole back with brown paper to look more professional-finished-art-work-y. It already had the picture hanging hardward installed on the back, or I would have installed one. 
 And looky-see here... a cute jewlery holder (necklaces and/or bracelets can hang on the hooks, and earrings can hang on the top):

Friday, July 1, 2011

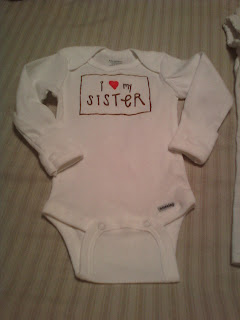
Kiddo shirts

Wanted to make the kiddos something fun to wear for when they get to meet each other for the first time. 
Just a white shirt (for the 5yr old) and a plain white onsie (for the baby) and some fabric paint/ reezer paper/ paint brushes. Super easy.